AMP Debugging
This chapter describes how to start debugging in AMP (Asymmetrical multiprocessing) mode where a separate winIDEA instance is opened for each core.
|
Configure the first Application via Wizard. |

|
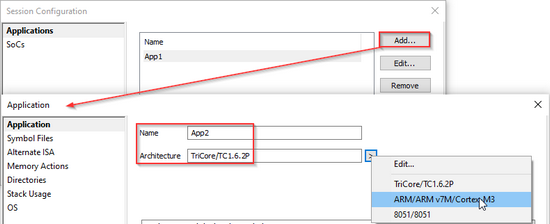
Add and configure the second Application via Debug / Session configuration / Application. |

Give the application a meaningful name, specify the Architecture and Symbol file in the Symbol Files.
 |
|
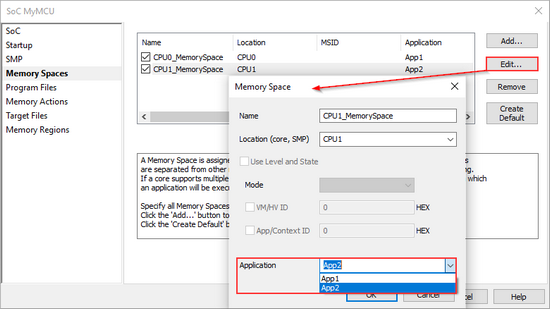
Define Memory Spaces for both Applications via Debug / Session configuration / SoCs / Memory Spaces. |

Make sure the correct Application is selected in the Application drop-down.
 |
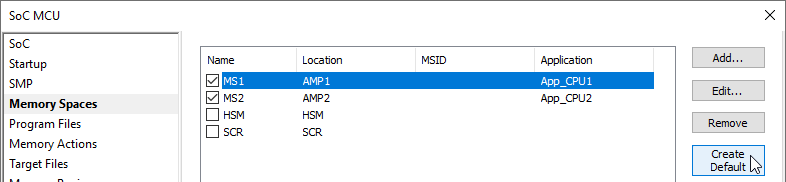 Application App_CPU1 is running in the AMP1 group (CPU0, CPU1, CPU2) with its own Memory Space MS1. Application App_CPU2 is running in the AMP2 group (CPU3, CPU4, CPU4) with its own Memory Space MS2. |
|
Perform Reset / Download. |

Begin a Debug session in the primary winIDEA instance via:
|
Download (this step will also Program the SoC). |
|
Load Symbols Only |
|
Reset |
|
Attach |


|
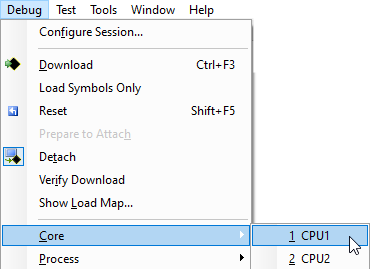
Open the secondary winIDEA instance via Debug / Core / <core>. |

 |
|
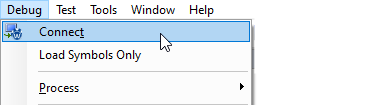
Connect to the primary winIDEA instance via Debug / Connect. |

 |