New Workspace Configuration
This chapter describes how to configure a new winIDEA workspace and/or automatically preset detailed CPU settings for various Target Boards.
|
Create a New Workspace. |

To create a new workspace select File menu / Workspace / New Workspace.
1. Give it a meaningful name. 2. Specify a location of your workspace. 3. Select the Debugger which will be used in this workspace.
 Make sure iSYSTEM Development Tools is selected if you work with iSYSTEM BlueBox. Make sure iSYSTEM Development Tools is selected if you work with iSYSTEM BlueBox. |

|
Select the Device. |

In the Basic Session Configuration dialog, select the device which is used on your target system.
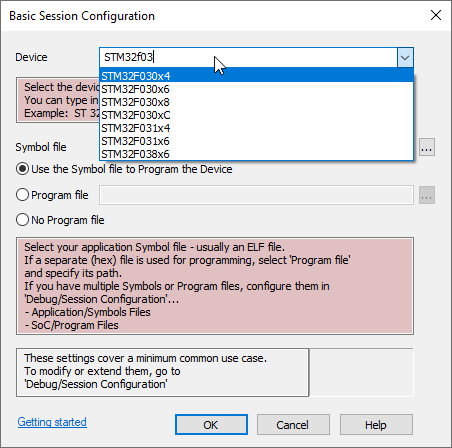 Simply start typing on the Device field parts of Device's name to quickly narrow down the search. You can use vendor's naming as well, e.g. Traveo, Chorus, Bolero, Kinetis, F1KM. |
|
Add Symbol (and Program) file. |

In the Basic Session Configuration dialog, add the Symbol file (and Program file) which is used on your target system.
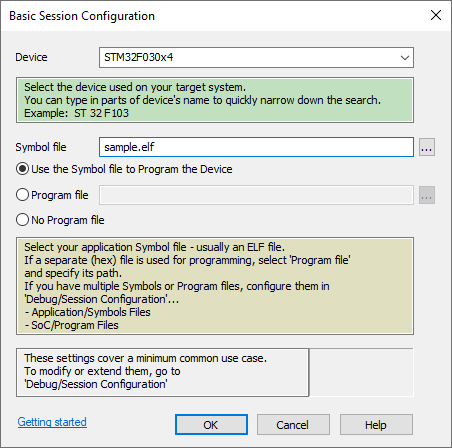 Do you have one download file?1. Add the Symbol file by clicking the 2. Make sure the Use the Symbol file to Program the Device option is checked.
Do you have a Symbol file and a Program file?1. Add the Symbol file by clicking the 2. Check the Program file option. 3. Add the Program file by clicking the
Your target doesn't need any Program files.Check the No Program file option if you don't want to load any content to your target.
If you have multiple download files, configure them in Debug menu / Session Configuration. Check the Take me there after the wizard button.
|


winIDEA will automatically detect connected and powered-on BlueBoxes.
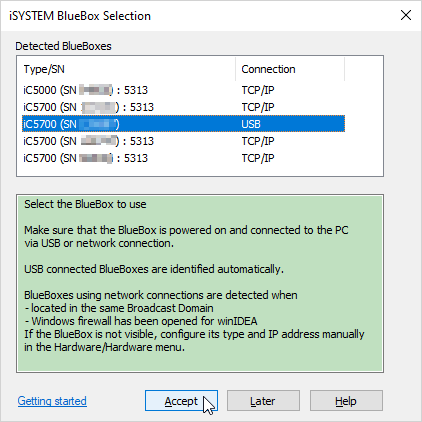 1. Select your BlueBox. 2. Press Accept.
You can configure the hardware later as well - press Later.
|
 |
If you use an Active Probe, make sure you configure it. Refer to chapter winDEA Configuration / Active Probe for more information. |
|
(Optional) Preset your Target Board. |

This dialog enables you to preset detailed CPU settings for the listed Target Boards. Refer to Target Board Presets for more information.
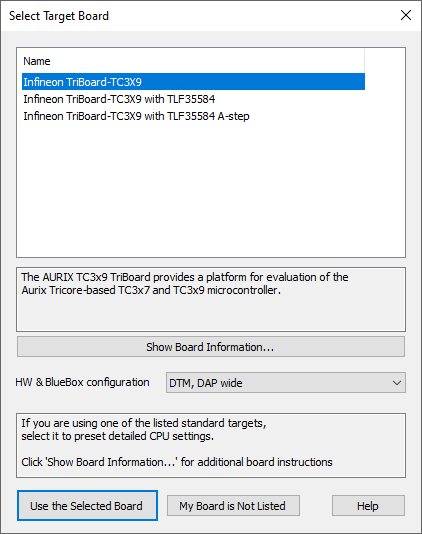 Show Board Information - Open winIDEA Help with additional help for the Target Board setup. Use the Selected Board - Automatically configure CPU settings for the selected Target Board. Note that by default winIDEA uses DAP connection for Infineon AURIX devices. My Board is Not Listed - Close the dialog and configure the options manually. |
Debuggers
winIDEA allows you to work with various Debuggers:
- iSYSTEM Development Tools (BlueBox) - Create a New Workspace
- GDB Client
- etc.