Getting started with winIDEA Examples Workspaces
winIDEA enables you to use examples that include most of the supported CPU architectures and hardware combinations. We recommend that you - first-time users, use these example for evaluation purposes and take them as a reference for your own configurations to get started with a new project as quickly as possible.
You can also follow our Tutorials on iSYSTEM website.
|
Download winIDEA Examples Workspaces. |

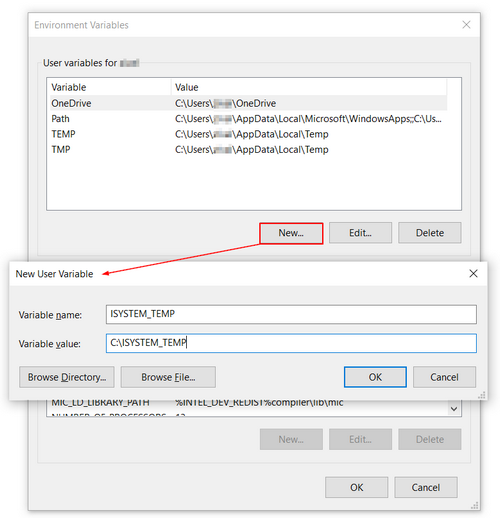
Examples are downloaded from iSYSTEM GitHub repository and extracted to the %USERPROFILE iSYSTEM\winIDEA\examples folder.
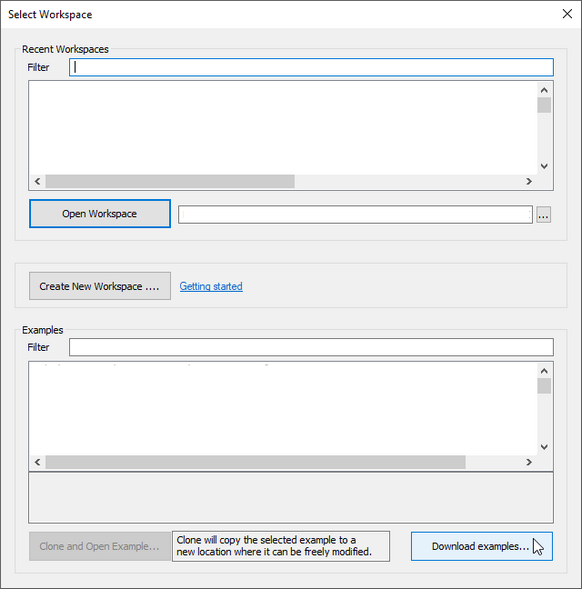 When first launching winIDEA Select Workspace dialog pops-up and you can download examples via Download examples button.
At any later time you can click File menu / Select Workspace. |


Select an example that matches your target CPU and iSYSTEM BlueBox in the Examples section. Description of an example is shown below the list-box.
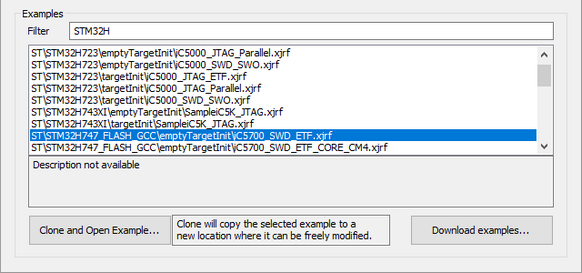 1. Use the Filter row to find a suitable example, which are separated by:
2. Double click the example or select an example and clik Clone and Open Example to copy it to a different location. This:
|
The default location for workspaces you clone is %USERPROFILE%/iSYSTEM/winIDEA/work. After you select the example, a dialog opens, where you can choose:
- Yes - Confirm this if you want to save your clone in the default location.
- No - Folder-selection dialog will open and the selected folder will be used.
The example is copied to a corresponding sub-folder, maintaining the folder structure from the examples. If a folder of the same name already exists (through a previous Clone operation), the new folder is appended an index e.g. "(1)" to its name.

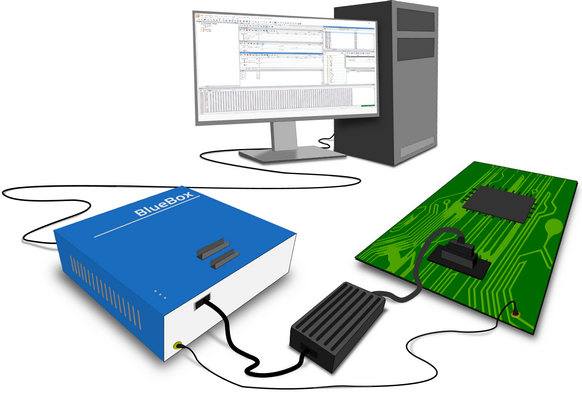 1. Connect the Power supply cable. 2. Connect the BlueBox to the PC USB port via the USB cable or Ethernet cable. 3. Connect the Grounding wire. 4. Connect the BlueBox to the Target via Debug Adapter or Active Probe. 5. Power up the system - First the BlueBox, then the target board. Make sure they are both powered and turned on.
 Need more information? Go to the Hardware Configuration chapter. Need more information? Go to the Hardware Configuration chapter. |

Configure BlueBox Type and Communication Port. Test the communication.
 1. Open the Hardware menu / Debugger Hardware / Hardware Type. 2. Select your BlueBox. 3. Click OK.
Need more information? Go to the BlueBox type chapter. |
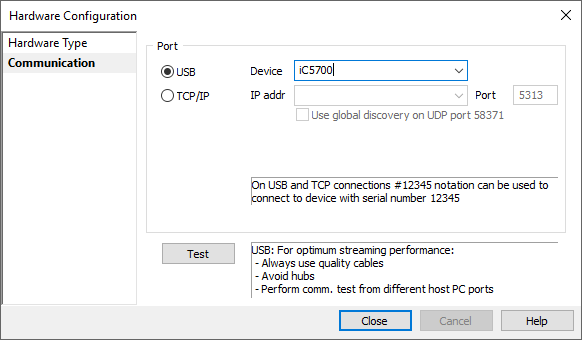 3. Open Hardware / Debugger Hardware / Communication. 4. Select USB (default) or TCP/IP port.
In case you have more connected BlueBoxes, select the suitable one from the drop-down menu Device.
Need more information? Go to the Communication Type chapter. |
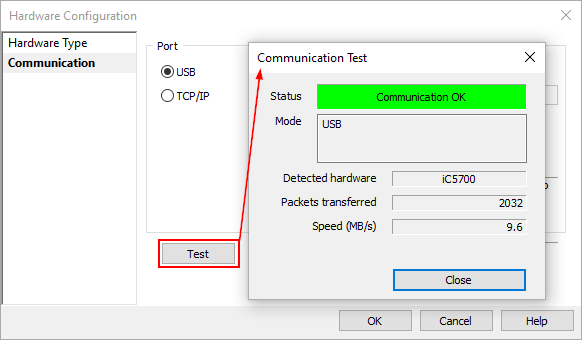 5. Click Test to verify that the communication with the BlueBox can be successfully established.
Need more information? Go to the Communication Test chapter. |

Download the application to the target with the Debug / Download command. Have fun debugging our sample project!
|
More resources |
